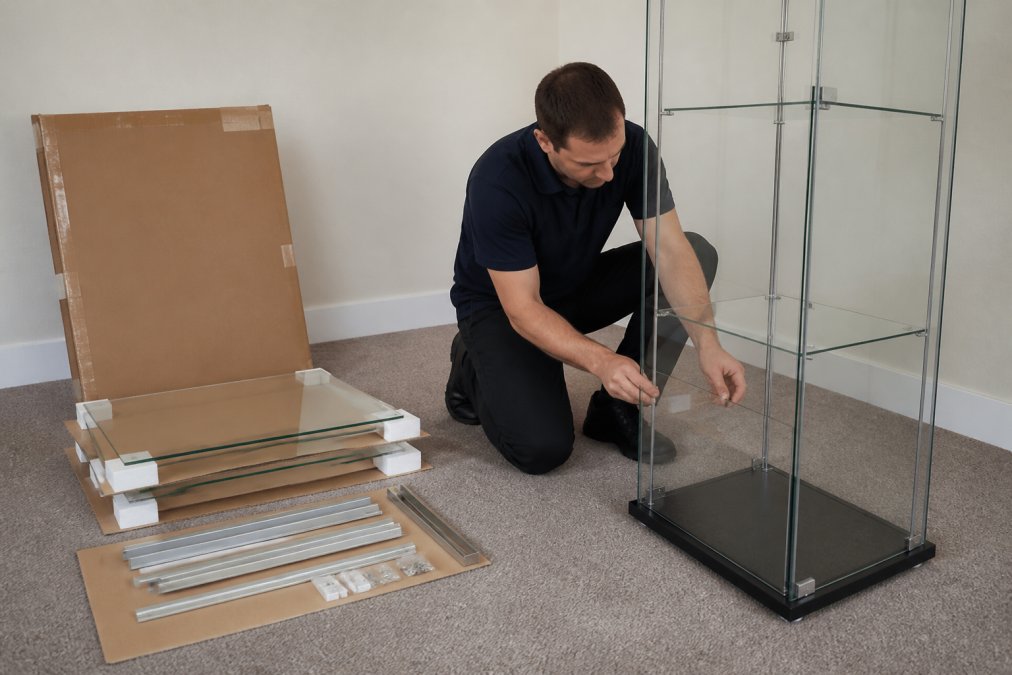
 comparison
Glass Display Case Assembly Service: Flatpack vs Built
Table of Contents
- What a Glass Display Case Assembly Service Actually Covers
- Flatpack vs Assembled Display Cabinets Cost: What You Really Pay For
- How to Assemble a Glass Display Cabinet with Lights
- Glass Display Cabinet Installation Service: What to Expect on the Day
- Common Assembly Mistakes and How to Avoid Them
- Weight Limits, Stability and Environmental Requirements
- Frequently Asked Questions
Last Updated: September 13, 2026
What a Glass Display Case Assembly Service Actually Covers
A glass display case assembly service is a professional build and installation offering in which trained fitters construct, level and wire a flat-packed glass display cabinet on your premises. At Display Cabinets UK, the service covers the full build of flatpack cabinets supplied with locking doors and internal lighting, plus free nationwide delivery. A display case is only as good as its weakest joint: a cabinet that is 90% correct still rattles, lets dust in, and fails to protect what is inside it.
Most people assume assembly is the easy part. It is not: glass panel handling, hinge alignment and cabinet leveling decide whether the finished unit looks premium or second-hand.
Flatpack vs Assembled Display Cabinets Cost: What You Really Pay For
Flatpack display cabinets cost less upfront but shift labour, risk and time onto you. Pre-assembled or professionally built cabinets cost more and remove almost all of that risk. The gap is smaller than the sticker price suggests once you account for what self-assembly consumes.
| Option | Upfront Cost | Labour & Time | Glass Damage Risk | Best For |
|---|---|---|---|---|
| Flatpack, self-assembled | Lowest | High, your own time | Highest | Confident DIYers, tight budgets |
| Flatpack plus build service | Middle | None, handled for you | Low | Most home and retail buyers |
| Fully pre-assembled delivery | Highest | None | Lowest | Urgent retail fit-outs |
The Hidden Costs of Self-Assembly
The hidden costs of self-assembly are time, tools and breakage. A flat-packed cabinet typically takes an afternoon, not the twenty minutes some listings suggest, and that assumes you own the right tools and a second pair of hands.
Then there is the risk you cannot insure against: dropping a tempered glass panel during fitting. Replacement panels are rarely cheap, and a chipped edge compromises the unit's structural integrity.
If you are weighing up flatpack versus assembled display cabinets on cost alone, price the cabinet, your time, and one replacement panel. The maths usually favours having it built.
How to Assemble a Glass Display Cabinet with Lights
To assemble a glass display cabinet with lights, work in this order: build the frame, level the base plinth, fit the back and side glass panels, run the lighting, then hang the doors last. Doors go on at the end because hinge alignment is easier once the carcass is square and stable.
- Unpack and sort all hardware components, checking glass panels for transit damage before you start
- Assemble the base plinth and frame on a soft, flat surface
- Level the cabinet using adjustable feet, checking with a spirit level in both directions
- Fit the back and side glass panels, using suction cups for anything above waist height
- Run the internal lighting cable through the pre-drilled channel and connect it
- Attach the locking doors and adjust the hinges until the gaps are even
- Fit any shelf adjustment brackets and check load-bearing capacity before loading
Wiring and Lighting Checks Before You Add Glass
Test the lighting before the glass goes in, never after. Once panels are fitted, a faulty connection means dismantling the cabinet to reach the wiring, turning a two-hour build into a two-day one.
Check the cable is routed clear of hinge movement, the transformer sits somewhere ventilated, and the plug reaches your socket without strain. Fit dust-proof seals after the lighting test so you are not peeling them back.
Glass Display Cabinet Installation Service: What to Expect on the Day
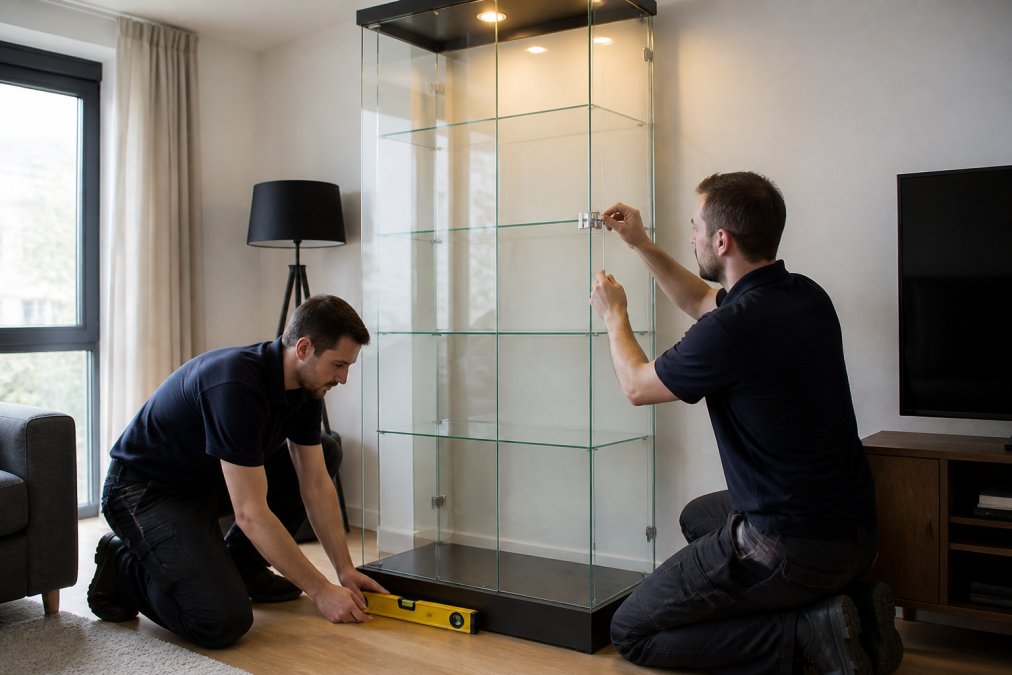
A glass display cabinet installation service typically takes one to three hours per cabinet, depending on size, lighting complexity and room access (which.co.uk). Fitters arrive with the flatpack, build it in situ, level it, wire the lighting, align the doors and take the packaging away.
Before the Fitters Arrive
The biggest cause of a delayed or aborted build is access, not assembly. A tall cabinet arrives flat-packed, but the assembled unit is bulky and top-heavy. Walk the route from delivery point to final position and check:
- Doorway and stairwell width. Measure the narrowest point on the route, not just the room. A cabinet that clears the front door can still jam on a hallway turn.
- Lift dimensions. Above ground floor, confirm the lift car depth and door opening. Many residential lifts take a flat pack but not a built carcass.
- Floor protection. Fitters lay protective sheets, but clearing fragile items, rugs and trailing cables beforehand saves time and avoids damage claims.
- Power access. The cabinet needs a nearby socket for internal lighting. Move furniture or arrange an extension before the day.
- Parking and loading. For retail or office fit-outs, confirm a loading bay or parking suspension if the delivery vehicle cannot stop legally outside.
If any of these are tight, tell the installer when booking. A pre-visit survey is standard for larger cabinets and far cheaper than a return trip.
What Happens During the Build
- Unpack and inspect. Glass panels are checked for transit chips or scratches before assembly. Any damage is logged before the packaging is removed.
- Position and level the plinth. The base is set on the final spot and levelled with adjustable feet, checked with a spirit level in both directions.
- Build the carcass. Frame, back and side panels go up, with suction cups used above waist height.
- Run and test the lighting. The cable is routed through the pre-drilled channel, the transformer positioned with ventilation, and the circuit tested before glass closes it in.
- Hang and align the doors. Doors go on last so hinge adjustment is made against a square, stable frame.
- Fit shelves and seals. Shelf brackets are set, dust seals fitted, and the glass given a final clean.
Working at Height and Site Safety
For taller cabinets, fitters work at height to fit upper panels and lighting. Under the Work at Height Regulations 2005, employers and the self-employed must avoid work at height where reasonably practicable, and where it cannot be avoided, use suitable equipment and prevent falls (hse.gov.uk). In practice that means a step platform rather than a chair, and a second person footing the base when a tall carcass is raised. For workplace installations, the installer should be able to explain their risk assessment.
Handover and Aftercare
- Demonstrate the locking mechanism and confirm the keys work smoothly
- Show you how to adjust shelf heights and hinge alignment yourself
- Confirm the lighting circuit and any remote or switch operation
- Remove all packaging and offcuts, and leave the glass smear-free
- Provide care instructions, including which cleaning products are safe for coated or low-iron glass
Ask for the model and batch details of any lighting transformer or lock, so replacements are straightforward later. Keep the assembly manual and spare fixings in a labelled bag taped inside the cabinet base.
What Separates a Good Installation from a Rushed One
The finishing work is the tell. Cabinet levelling, hinge alignment and a final clean of the glass panels make a display unit look like bespoke cabinetry rather than a flatpack. If a fitter leaves before checking door gaps are even and the cabinet sits flush to the wall, the build is not finished.
Common Assembly Mistakes and How to Avoid Them
The most common assembly mistakes are building on an uneven floor, overtightening glass fixings, and fitting doors before the frame is square. Each produces the same symptoms: rattling, misaligned doors and gaps that let dust in.
- Skipping the level check. An unlevel base plinth twists the whole frame. Level the cabinet before the glass goes near it.
- Overtightening clamps and screws. Glass needs firm contact, not force. Over-tightened fixings are a leading cause of cracked panels.
- Hanging doors too early. Fit doors last, once the carcass is rigid, so hinge alignment stays true.
- Ignoring the assembly manual. Sequence matters. Skipping a step usually means dismantling half the cabinet later.
- Lifting glass alone. Glass panels above waist height need two people or suction cups. This is where most breakages happen.
If you are buying flatpack and building it yourself, these five points cover the majority of problems. If you would rather not risk any of them, a build service removes the whole category of error.
Weight Limits, Stability and Environmental Requirements
Weight capacity and stability depend on the shelf material, the fixings and the surface the cabinet stands on. Tempered glass shelves carry a stated load limit, and that limit drops sharply if the load is concentrated in one spot. Most buyers never read this part of the specification, yet it decides whether a cabinet stays safe for years.
How Much Weight a Glass Shelf Actually Holds
Manufacturers publish a per-shelf load rating in kilograms for an evenly distributed load. Treat it as a ceiling, not a target, and apply these rules:
- Distribute, do not concentrate. A 20 kg rating assumes weight spread across the shelf. A single heavy object on one corner can crack a panel well below the stated limit.
- Heavy items low, light items high. Keeping dense stock on lower shelves lowers the centre of gravity and reduces leverage on the frame if the cabinet is nudged.
- Check the shelf support, not just the glass. The rating assumes the brackets or pins are correctly seated. A shelf resting on one misaligned pin carries uneven stress.
- Allow for the cabinet, not just the contents. Tall units are top-heavy when loaded at the top, which is why anchoring matters more than the shelf rating alone.
If you are unsure of the rating for a specific cabinet, ask the supplier for the shelf load figure in writing before loading it.
Stability and Wall Anchoring
Tall glass display cabinets can tip if a door is left open and weight shifts forward, or if someone leans on or climbs the unit. This is a particular risk in homes with children or pets, and in high-footfall retail environments.
- Anchor tall cabinets to the wall. Use fixings rated for the wall type, masonry plugs for solid walls, appropriate cavity fixings for plasterboard. A cabinet that is merely standing is not stable.
- Check the floor. Adjustable feet compensate for small slopes, but a badly uneven floor means the frame twists and the doors will not stay aligned.
- Respect door swing. A fully open glass door moves the centre of gravity forward. If the cabinet sits in a walkway, consider a unit with sliding or hinged doors that open against a wall.
- Re-check after loading. Once shelves are stocked, confirm the cabinet still sits level and the doors still close with even gaps.
For workplace installations, the Provision and Use of Work Equipment Regulations 1998 require employers to ensure equipment is suitable, maintained and installed safely (hse.gov.uk). A display cabinet is not work equipment in the usual sense, but the principle applies: if it is unstable, it is not fit for purpose.
Environmental Requirements for Sensitive Contents
If you display collectibles, jewellery, watches, documents or anything sensitive to light and moisture, the room matters as much as the cabinet.
- Humidity. Damp rooms work against dust-proof seals and encourage corrosion on metal hardware and hinges. Aim for stable, moderate indoor humidity and avoid placing cabinets against external walls that suffer condensation.
- Direct sunlight. Ultraviolet light fades fabrics, paper, dyes and some plastics, and heat build-up stresses seals and adhesives. Position cabinets out of direct sun, or use glass with a UV-filtering coating where contents are valuable.
- Temperature swings. Rapid changes cause condensation on glass and metal. Keep cabinets away from radiators, heat pumps and air-conditioning vents.
- Lighting heat. Internal LED lighting runs cooler than halogen, but transformers still need ventilation. Do not block the ventilation gap behind the cabinet.
- Dust and pests. Dust-proof seals slow ingress, but a cabinet in a workshop or near an open door will still collect debris. Clean shelves and glass on a regular cycle rather than waiting for visible build-up.
A Simple Pre-Load Checklist
Before you put anything valuable inside a newly assembled cabinet:
- Confirm the shelf load rating and never exceed it.
- Check the cabinet is level and the doors close with even gaps.
- Anchor tall units to the wall.
- Confirm the lighting circuit is tested and the transformer is ventilated.
- Position the cabinet away from direct sun, damp walls and heat sources.
- Photograph the loaded shelves so you have a record of the arrangement and the weight distribution.
Structural integrity is not just about the glass. It is the base plinth, the fixings, the floor beneath them and the environment around them working together.
Frequently Asked Questions
How much does a professional glass display case assembly service cost?
Pricing depends on the cabinet size, whether it has locks and lights, and your location. A build service typically costs more than the flatpack price because it includes labour, travel and the risk of any glass breakage during construction. For a current quote on your specific cabinet, check the Display Cabinets UK website or request a quote directly.
Is it difficult to assemble a glass cabinet with lights and locks?
It is manageable if you follow the assembly manual and have two people. The tricky parts are wiring the internal lighting before the glass panels go in, aligning the hinge so the locking doors close flush, and keeping the cabinet level on uneven floors. If any of those steps go wrong, you risk cracked glass or a door that never sits right.
What are the benefits of choosing pre-assembled display cabinets?
Pre-assembled or build-service cabinets arrive ready to use, so there is no risk of incorrect assembly, no glass breakage during setup, and no hours lost to levelling and hinge alignment. The trade-off is a higher upfront cost compared to flatpack, but for retailers who need a display unit ready for a launch or exhibition deadline, the saved time often outweighs the difference.
How do I prepare my space for a new glass display case?
Clear the floor area and check the delivery route for narrow doorways or stairs, since flatpack ships in smaller boxes while assembled units need a wider path. Check the floor is level, allow at least 50mm clearance around the cabinet for door swing, and have a nearby socket if you have chosen internal lighting. Measuring the space before ordering avoids most site delivery problems.
A cabinet that rattles, leans or lets in dust is almost always an assembly problem, not a product problem. Display Cabinets UK supplies premium glass display cabinets with locking doors and internal lighting, as flatpack or with a full build service, plus free nationwide delivery. If you want the cabinet built, levelled and lit before it holds anything valuable, check out the Display Cabinets UK range and book the assembly service with your order.